How to Update Router Firmware

Updating your router firmware can help improve connectivity and keep your router secure. It is always recommended to install the latest available updates to keep your network safe and efficient. Most routers have a built-in update checker, which may or may not perform the entire process automatically. If you’re using an Apple AirPort router, you can use the AirPort Utility program to check for updates.
Part 1
Finding Your Router’s Address (Windows)
1. Check the physical router for the address. You can access your router by entering its IP address into your web browser. Most routers have this IP address printed on the sticker affixed to the bottom. If your router does not, or you don’t have access to the physical router, follow these instructions to find it.
- If you are using a Mac, skip down to the next section.
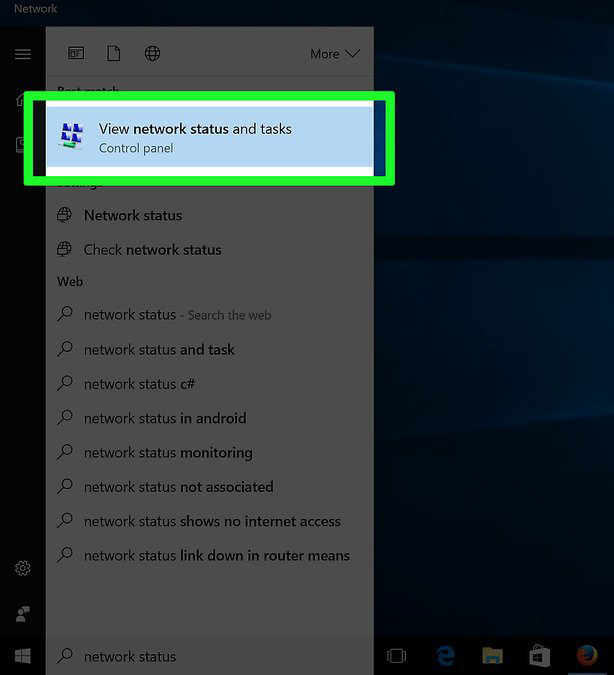
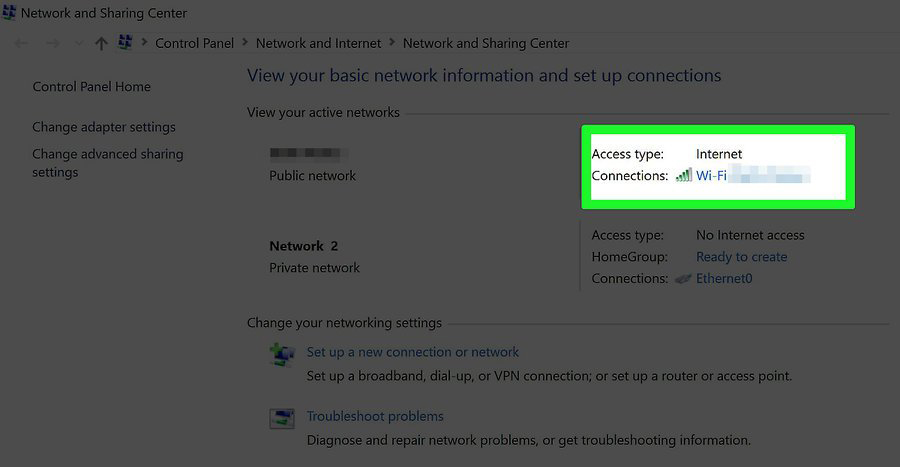
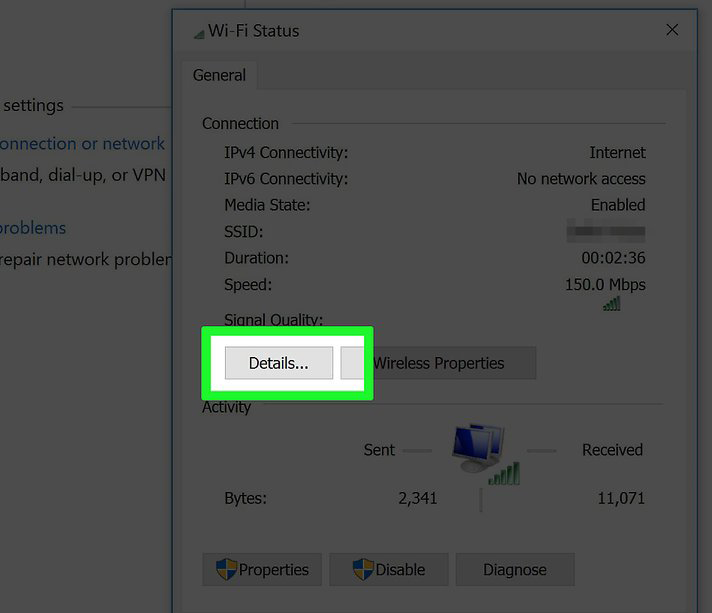
3. Click the name of your current connection in the top-right corner. it will have an icon indicating the type of connection you are using (Wi-Fi, Ethernet, etc.).
- Make sure you’re connected to the router’s network.

Part 2
Finding Your Router’s Address (Mac)
1. Check your physical router for the IP address. You’ll access your router’s configuration page by entering its IP address into a web browser on your computer. Most routers have the IP address printed on a sticker on the bottom. If your router doesn’t have this sticker, or you can’t physically access the router, follow the instructions in this method.
- If you are using an Apple AirPort router, see the Updating an AirPort Router section below instead.
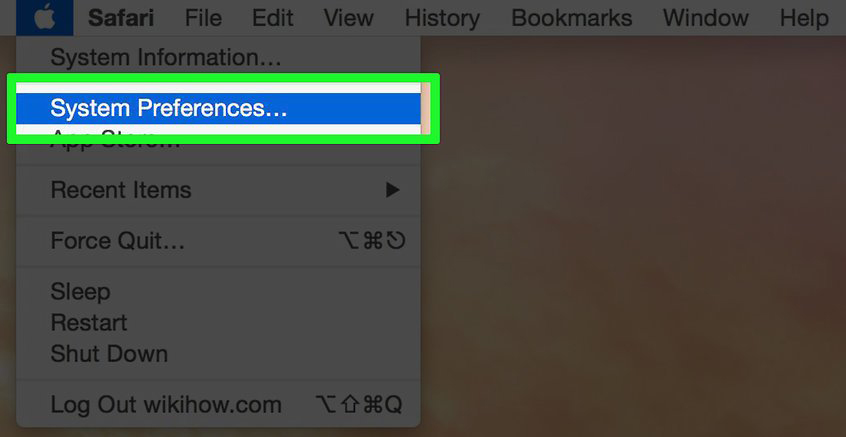
2. Click the Apple menu and select “System Preferences.” This will open a new System Preferences window.

3. Click the “Network” button. This will display all of your network connections.
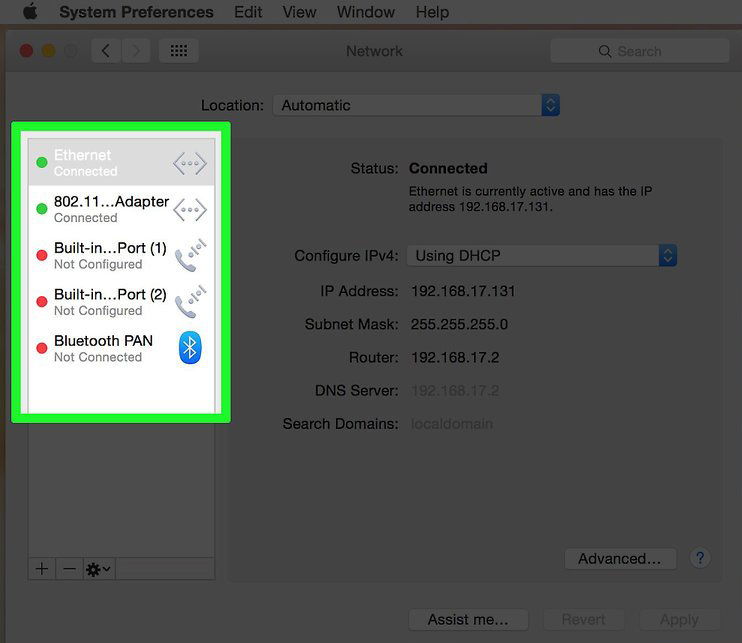
4. Select your active connection in the left frame. It will have a green indicator next to it, and will say “Connected” underneath.
- Make sure you’re connected to the router’s network.
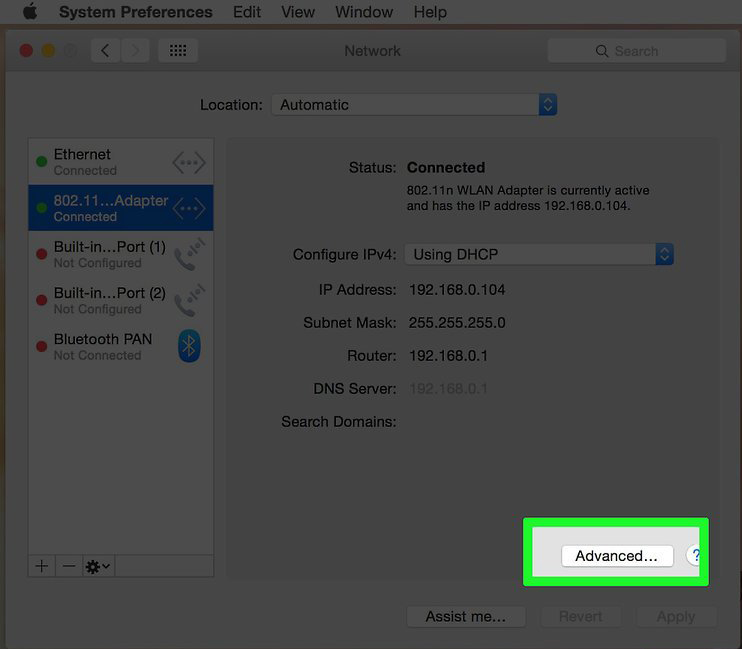
5. Click the “Advanced” button. This will open a new window.
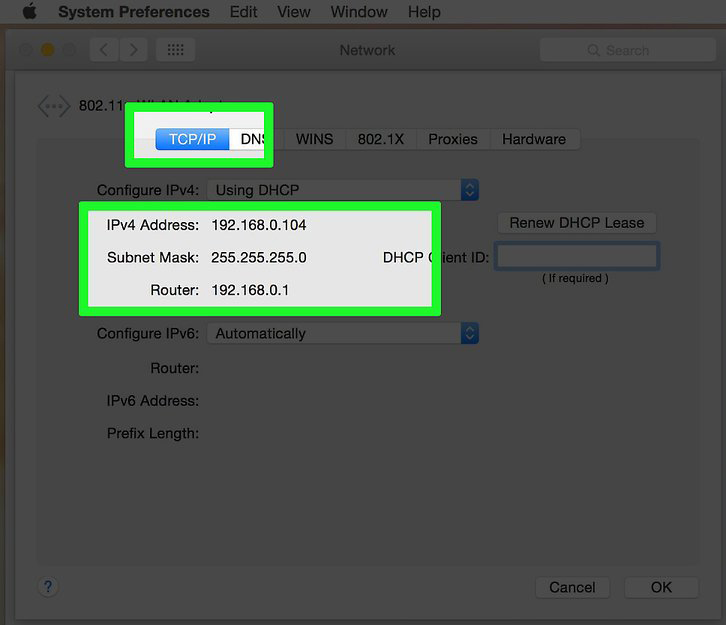
6. Click the “TCP/IP” tab and look for the “Router” entry. This is the IP address for your router.
Part3
Installing Router Updates

1. Connect to the router via Ethernet. Some routers are setup to not allow access to the configuration page if you are connected via Wi-Fi. Connecting via Ethernet will help ensure that you can properly access the configuration tools.
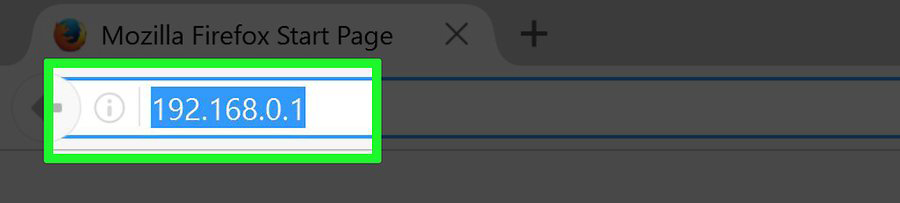
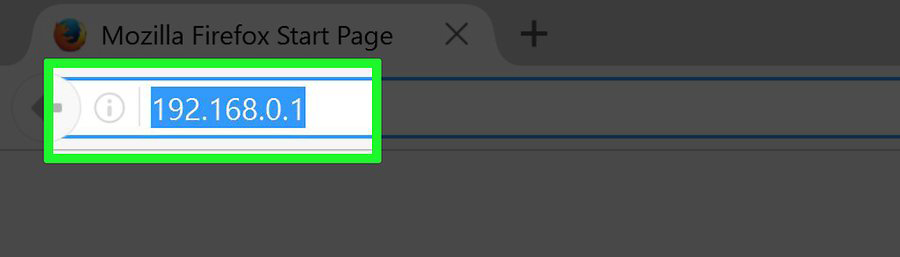
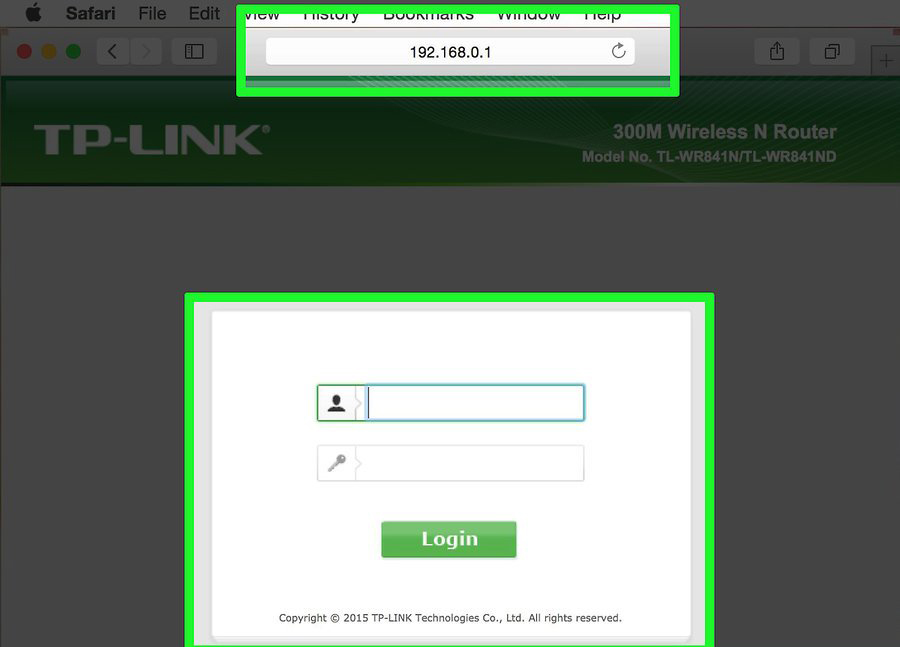
2. Enter your router’s IP address into a web browser’s address bar. You can find this address by following the methods outlined above.
- Enter the address as if you were visiting a webpage.

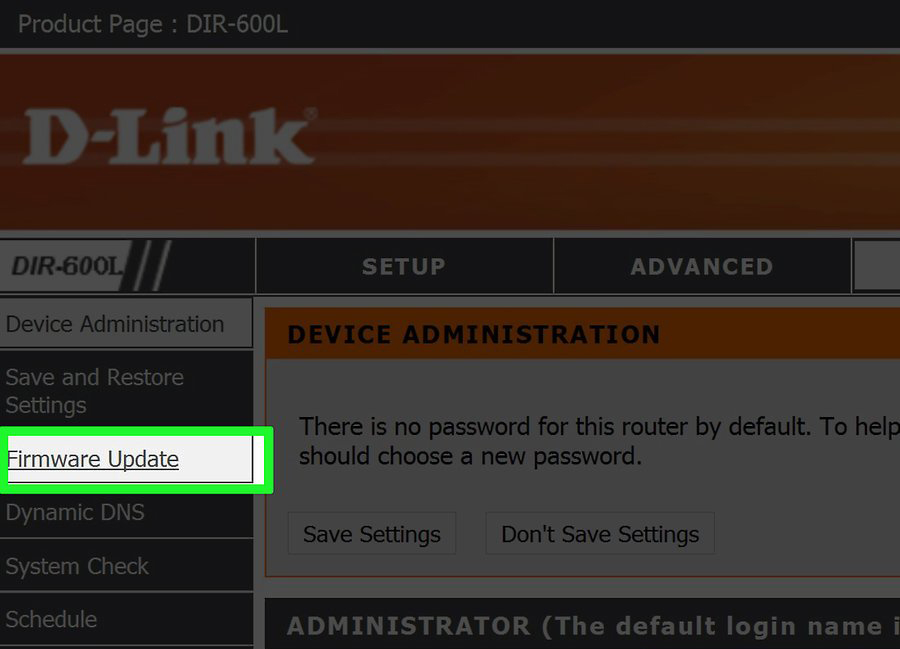
3. Enter your login information. When you try to open the configuration page, you’ll be prompted to enter your router login information. If you don’t have this information saved, you can try some of the common defaults:
- Try leaving both fields blank. Many routers don’t have any username or password required.
- Try entering “admin” as the username, and then leave the password blank. If that doesn’t work, enter “admin” as the password as well.
- Look up your router make and model at routerpasswords.com. This will display the default login information.
- If the default login information doesn’t work, and you can’t figure out how to log in, you can reset the router by pressing and holding the physical Reset button on the back. This will erase all of your router’s settings, possibly disrupting your wireless network if you changed any default settings for it. You can then use the default login.

- Perform a web search to find the support site. For example, searching for “Netgear support” will get you the netgear.com/support link.
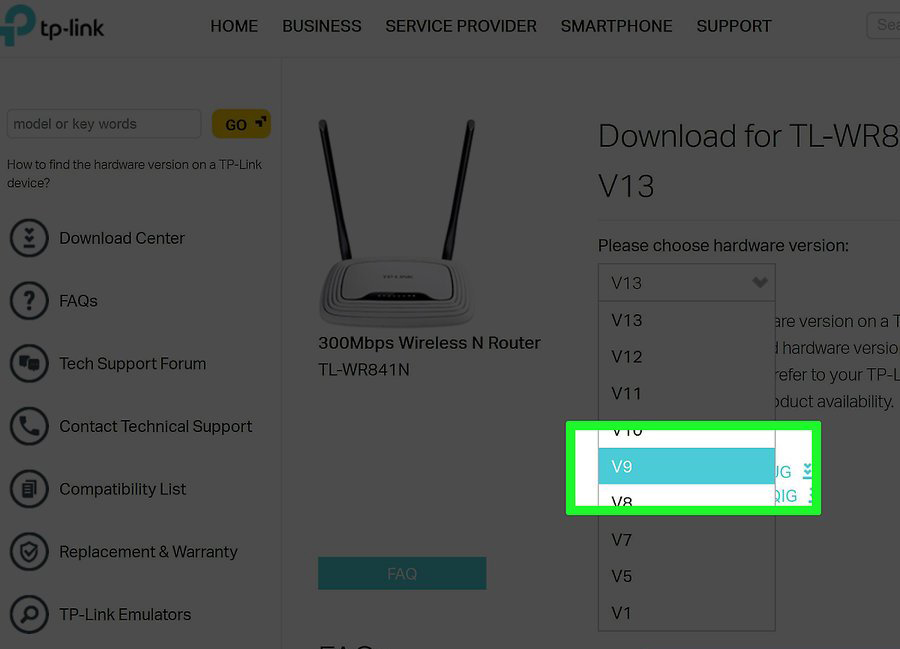
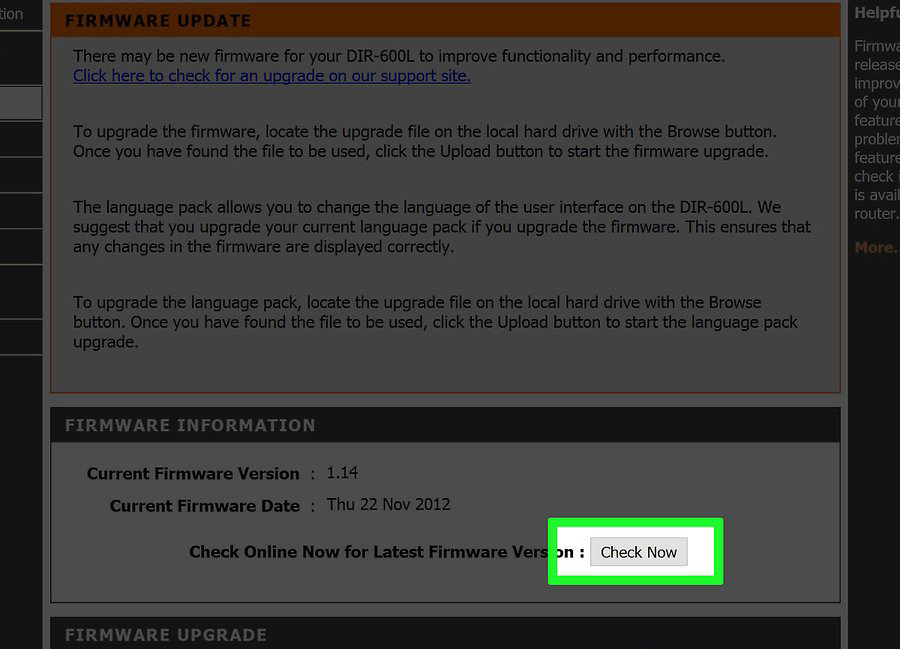
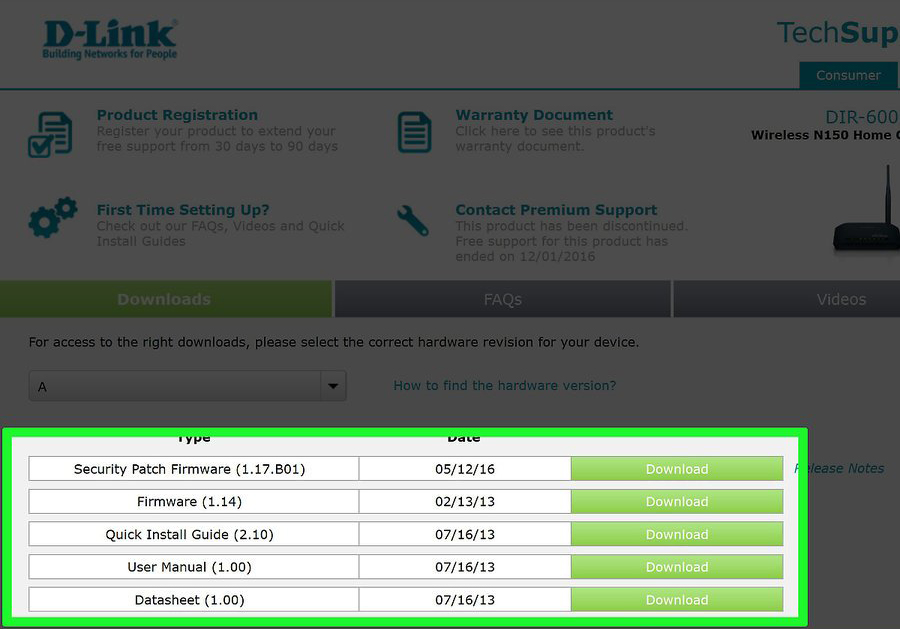
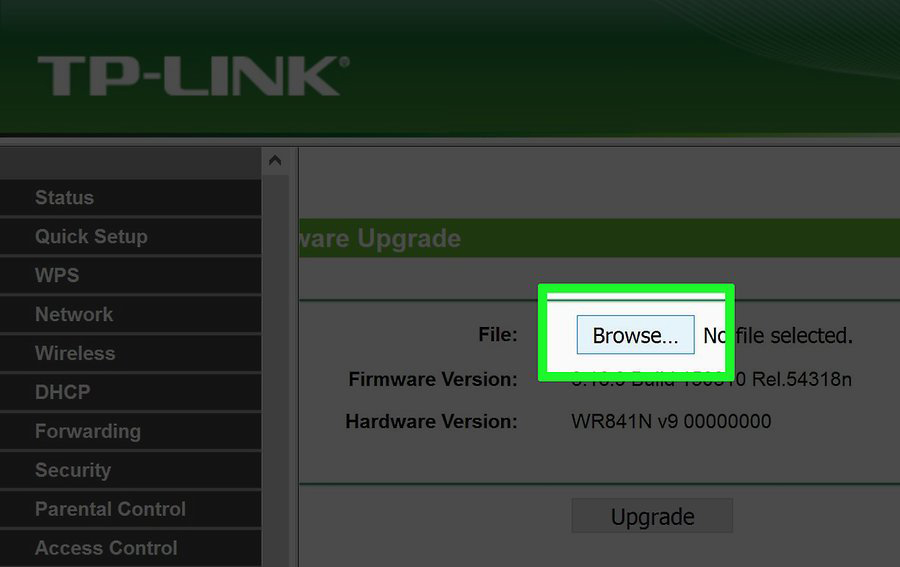
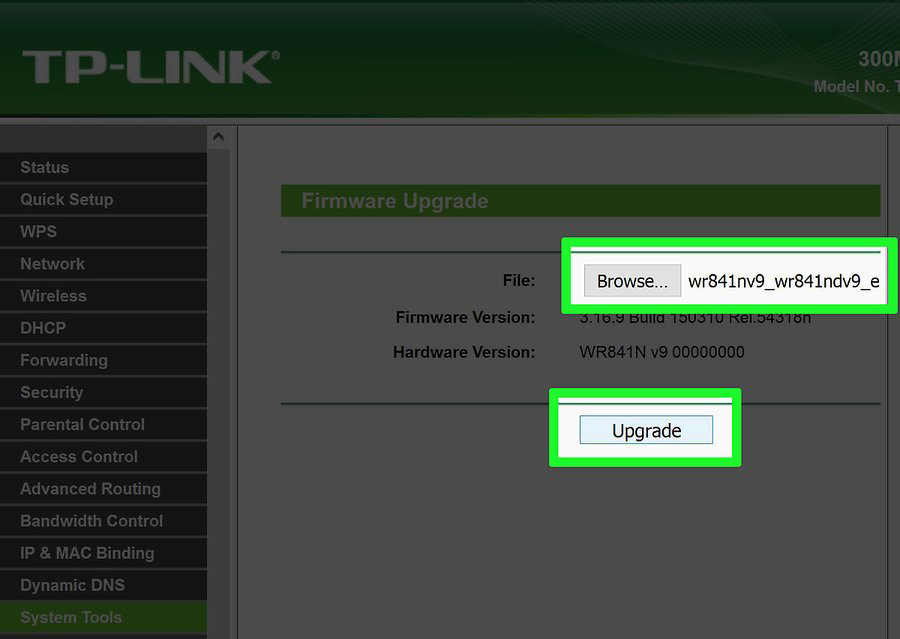
- Make sure you don’t download a version earlier than the one you’re using. You can see what version you’re using on your router’s firmware update configuration page.
Part4
Updating an AirPort Router
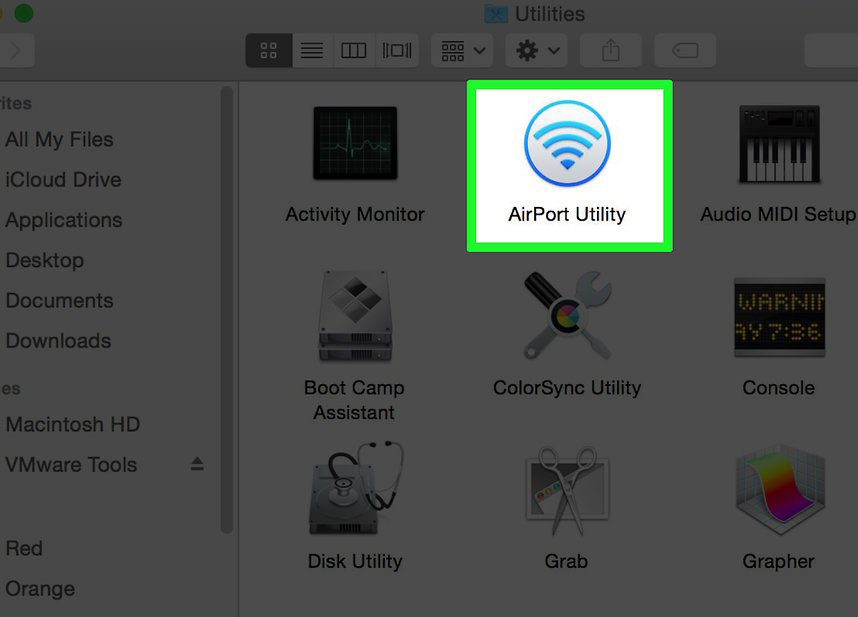
1. Open the AirPort Utility program in your Utilities folder. This program allows you to change your AirPort router’s settings. You can find the Utilities folder in your Applications folder.
- If you’re using an iOS device, you can download the AirPort Utility from the App Store.
- The AirPort Utility is only available on Mac OS X and iOS devices.
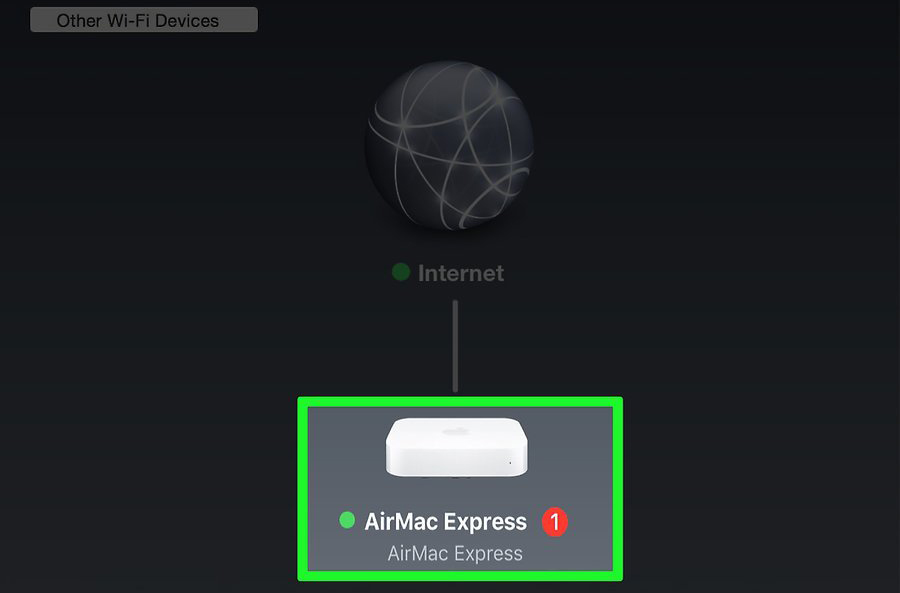
2. Click your base station and enter your password. The base station icon may have a red badge number indicating that an update is available, but this may not appear until after you’ve entered your password.

3. Click the “Update” button to download and install the update. This button only appears if an update is available. Click “Continue” when prompted to confirm.
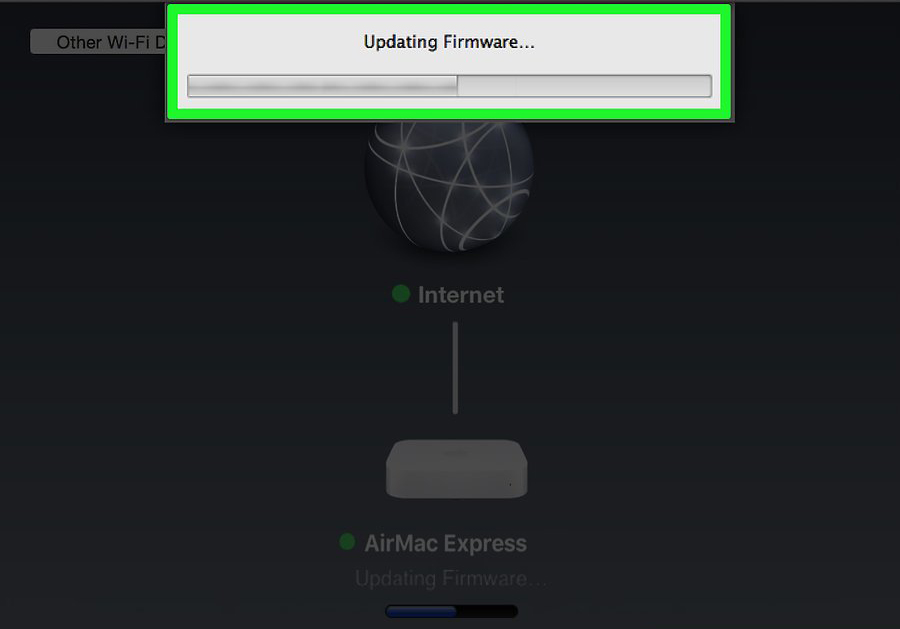
4. Wait for the router to update. This may take several minutes to complete. You will be disconnected from the network for a short time during the update process.
![]()