Signing up for Cloudflare is incredibly easy and takes less than 5 minutes. This article outlines the steps to successfully create an account and add your first website.
Create an account and add a website
- Go to www.cloudflare.com and click the Sign up link at the top of the page.
- Create a Cloudflare account by typing your email address and password. Click Create account now to proceed
- Pro Tip: It is recommend to use an email alias or distribution list. For example, cloudflare@company.com. Billing and service-related email notifications will be sent to this email address.
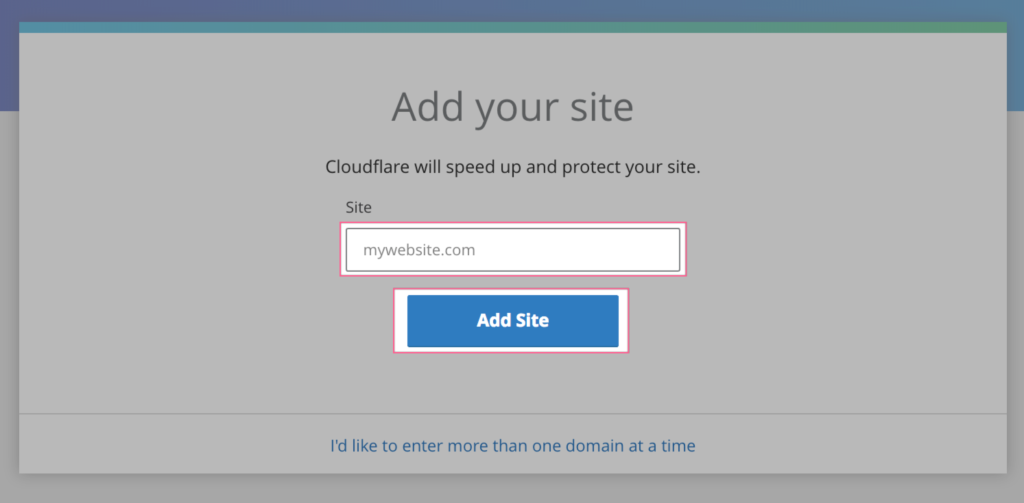
- Enter the domain for your website and then click Add Site. It’s not necessary to add “www” to the domain. For example, if your website is www.example.com, type mywebsite.com.
- It will scan your domain’s DNS records. This will take approximately 60 seconds to complete. Once the DNS scan has finished, click Next.
- Select a plan that fits your needs and then click Confirm Plan.
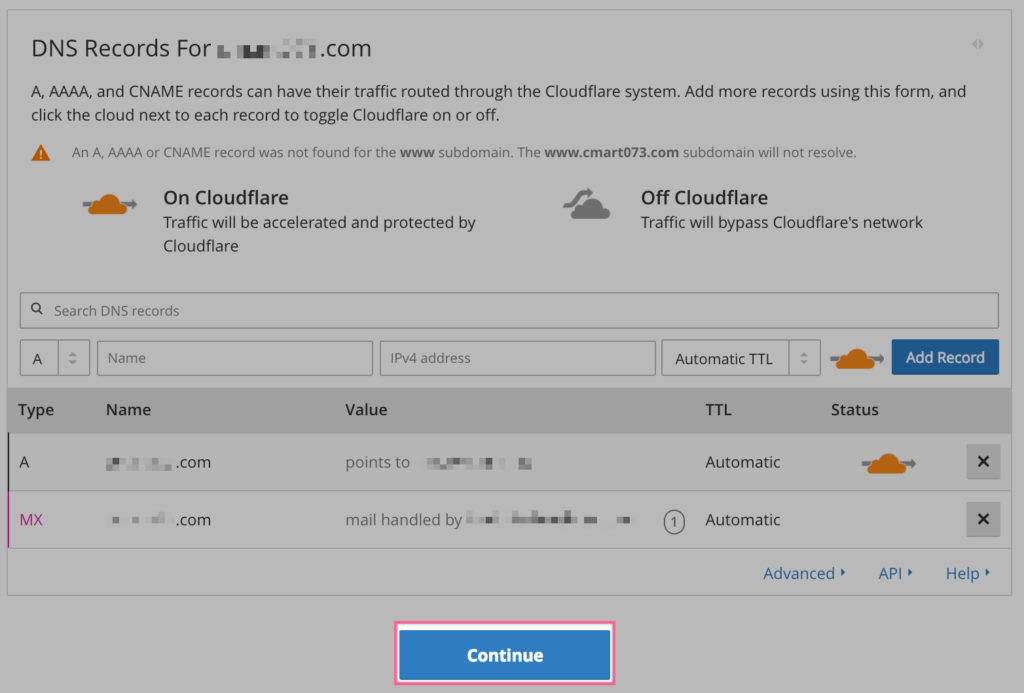
- A list of all the DNS records found is displayed, including your subdomains. In this step, you can decide which subdomains you want to enable Cloudflare () or bypass Cloudflare (). Some records, like MX, never go through Cloudflare (no cloud).
If there are any additional records you’d like to add, you can add them here. After you’ve reviewed your DNS records, click Continue.
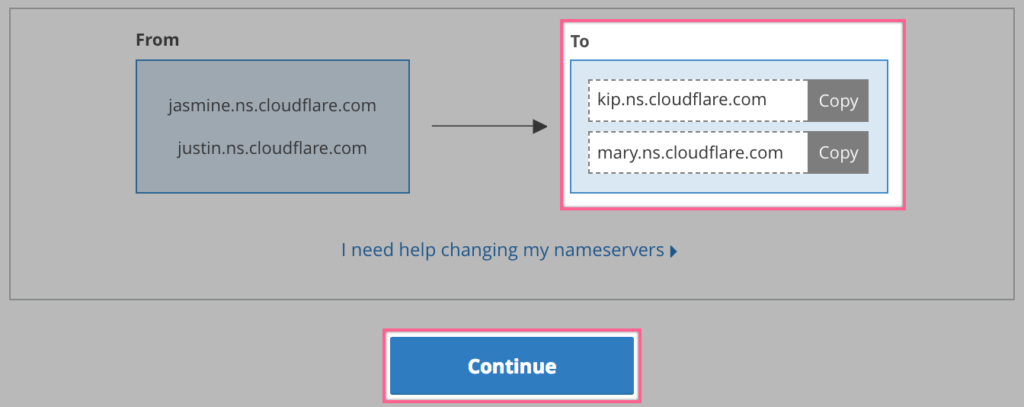
- On the final step, you are given the Cloudflare nameservers for your domain. The Cloudflare nameservers are assigned to your domain and listed on this page.
Note: Please write down the Cloudflare nameservers. You can also find your Cloudflare nameservers in your Cloudflare dashboard under Overview.
Congratulations! You’ve successfully created your new Cloudflare account! But you’re not done yet! The final step is to update the nameservers for your domain with the Cloudflare nameservers provided in the previous step.
You should now proceed to the Crypto tab of your new Cloudflare account to verify that Cloudflare’s Universal SSL records have been provisioned for your domain. They should appear as two records in the Edge Certificates section: One for your root domain ( mywebsite.com ) and one wildcard subdomain record (*.
mywebsite .com). Once you have verified that those are in place you are all set to serve SSL! If you do not see those records quite yet do not worry, they should be provisioned within 24 hours (please contact support@cloudflare.com if they are not). In the meantime, we would recommend Pausing Cloudflare until they are provisioned.
Note: Allow up to 72 hours for the nameserver information to propagate. You will receive a confirmation email from Cloudflare when the nameservers update is complete. Your site will not experience any downtime during this period.
Now you know how to Create a Cloudflare account and add your website!
Learn something new everyday!
![]()